12 Adorable DIY Nursery Decor Crafts
There’s something about being pregnant that brings out the crafty side of many moms-to-be. Chalk it up to the nesting instinct, or the fact that creating a baby makes other DIY projects seem laughably easy—either way, when you’re in full nursery-decorating mode, the desire to craft one-of-a-kind things can strike even the least creative of the bunch. Of course, having the right inspiration (and easy-to-follow instructions) go a long way in getting projects off the ground. Here, we’ve rounded up the most heart-meltingly cute DIY nursery decor items that’ll make baby’s room an extra-special place.
Floral Monogram
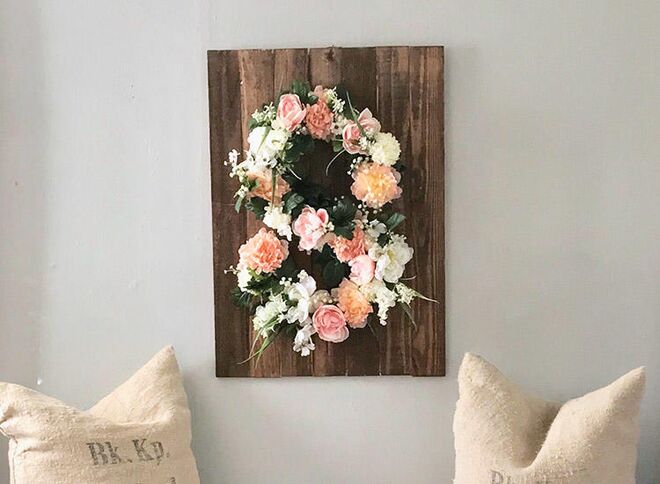
Moss-covered lettering is a super-popular wedding decoration—but by swapping the moss out for fake florals, the blogger behind Southern Girl City Mom translates that inspiration into an easy DIY nursery decor project that adds a touch of natural beauty to baby’s room.
What you’ll need: A 24-inch, three-dimensional cardboard letter, box cutter, low-temp glue gun or spray adhesive, floral foam, fake flowers and wire cutters.
How to make it: Using a box cutter, remove the front surface of the letter by cutting around the front edge, leaving you with a hollowed out letter. Glue pieces of floral foam inside. Trim the flower stems using the wire cutters, leaving at least an inch of stem remaining. Space out the larger flowers around the letter and insert them into the foam, placing a small dot of glue at the end of their stems and along the back of the blooms to ensure they stay in place. Then fill in the letter shape with smaller flowers and leaves. You can hang the letter as-is, or attach it to a canvas or piece of wood for a larger statement piece.
Wooden Toy Box with Wheels
This sweet DIY nursery decor idea from This Little Street transforms a basic wooden crate into a multi-functional, custom toy chest with an eye-catching cushioned seat and colored casters, making playtime clean-up all the easier.
What you’ll need: A wooden crate (either plain or painted in a color of your choosing), colorful casters, drill and screws, fabric, a piece of plywood cut to fit the top of the crate; foam sheet cut to same size as the plywood lid and a fabric stapler.
How to make it: Flip the wooden crate upside down, then place one caster at each corner and attach them to the bottom of the crate with screws. Spread your piece of fabric out on the floor, placing the foam and then the plywood on top of it. Cut the fabric so it’s big enough to cover the foam and plywood, leaving an extra inch to staple. Fold the fabric over and staple the fabric to the plywood. Place the crate right-side up, nestle the cushioned lid over the crate and voilà!
Mountain Mural
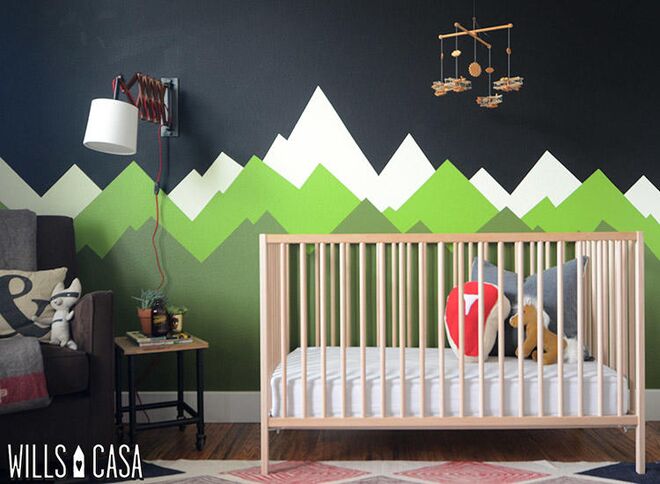
The bloggers at Wills Casa got the inspiration for this hip mural from a room at the Ace Hotel. This DIY nursery decor idea hits just the right note for outdoorsy types who hanker for an unexpected look for their nursery. It’s also a smart design to choose if you want a nursery look that’ll grow with your little one.
What you’ll need: House paint in black and three shades of green, graph paper, a large leveled ruler and Frog tape.
How to make it: Mixing paint in flat and satin finishes will add more dimension to this stunning mural. In all likelihood, you won’t care for paint fumes while pregnant, so try to tackle this DIY nursery decor project with the help of your partner. Find the complete instructions at Wils Casa.
Seashell Growth Chart
Instead of marring your doorframes with pencil ticks, keep track of your growing baby’s height with this sweet under-the-sea-themed growth chart from Spot of Tea Designs. It’s fully portable, meaning if your family ever moves—or your child switches rooms—you won’t lose those precious records of how fast your little one got so big.
What you’ll need: A rectangular piece of wood, about 4.5 to 5.5 feet long; sand paper; white, purple, pink and green acrylic paint; paintbrush; pencil; hanging hook and ruler.
How to make it: Sand down the wooden board until perfectly smooth, then wipe clean. Cover with two coats of white paint and let dry. To achieve the ombré effect, paint sections of the board in different hues of pink, purple and green, blending the blocks of color as you go. Once the paint has dried, use a pencil to sketch out the ruler measurements along the left side and your seashell designs on the right, then trace the lines in white paint. Attach a hook to the back and hang, using a ruler to make sure your bottom measurement is indeed that far above the floor.
Wooden Baby Gym
Why pay top dollar for a Scandi-chic baby gym when you can make one yourself? This hand-crafted wooden gym by Empty Handed looks just as sleek as any store-bought option but—bonus!—lets you switch out the toys and even use it as a play tent frame. If you own a few basic hand tools and are minimally adept at using them, this is a simple, inexpensive DIY nursery decor project that yields big results.
What you’ll need: Four pieces of wood measuring 29 inches x 1.5 inches x 3/4 inches, ruler, pencil, hand saw, chisel, clamp, wood glue, drill and bit, a dowel 1 inch wide and 30 inches long, hammer, coarse file or fine sandpaper and Danish oil.
How to make it: Decide how high and wide you want your gym to be, then use those measurements to determine the length and angle of the gym legs. Lay two of the legs on your work surface at the angle you want them to be and mark where they cross over. Using your handsaw and chisel, cut out the crossover section so the two legs fit together with a flush finish. Repeat with the other set of legs. Angle the bottom of each set of legs off so they’ll sit flat on the floor. Hold your joining legs together and drill a hole for the cross beam dowel, then glue the legs together and clamp. When dry, hammer the dowel in and glue in place. Wait for the glue to fully dry, then sand the gym down and seal with a coat of Danish oil.
Nursery Closet Dividers
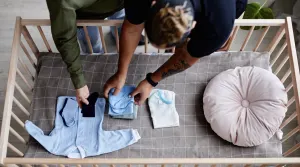
It happens to the best of us: An impossibly precious baby outfit looks way too big, so you tuck it away in a drawer, only to rediscover it once baby has outgrown it. A smart way to keep track of the clothes your child will soon be able to wear? Closet dividers! This DIY nursery decor project from Lady & Laura Kate lets you organize outfits by size.
What you’ll need: Cardstock, scissors, double-sided tape and a corner punch (optional).
How to make it: You can certainly paint a design on them if you’re so inclined, but these instructions use graphics that come courtesy of a free download. You also have the option of making them double or single-sided. Eager to get going? Click the link above for all the details.
Dream Catcher
Every child is bound to have a some restless nights with bad dreams, but this bright, upbeat dream catcher is a fun way to help snag those nightmares before they set in. This DIY nursery decor item from Make & Do Studio is easy to make and customize to suit your design style. Just be sure to hang it well out of baby’s reach, never over the crib.
What you’ll need: Embroidery hoop, washi tape, scissors, colored yarn, craft feathers, felt balls, beads and other decorations of your choice (optional).
How to make it: Wrap the embroidery hoop in cut pieces of washi tape. Loop the colored yarn across the hoop in a web pattern and tie to secure. String the beads onto a few pieces of yarn and tie them off with feathers, felt balls, yarn tassels and other assorted decorations, then tie them to the bottom of the dream catcher so they dangle at alternating lengths.
Ombré Faux Hanging Shelves
Looking for a modern twist on the standard nursery bookcase? This DIY nursery decor project by Ducklings in a Row adds an ombré look to hanging shelves, ideal for storing board books and other keepsakes while saving on floor space. This trio of shelves was made in different shades of pink, but you can add any color of your choosing to match baby’s room.
What you’ll need: Three floating wall shelves, painters’ tape, two cans of spray paint in two shades of the same color, colored poly cord, scissors, glue gun and glue sticks, drill, stud finder, pencil and level.
How to make it: Tape around the perimeter of your shelf base and any other areas you want to keep white. Spray the side edges of two shelves in your selected colors (one in a darker hue, one lighter) and allow to dry, removing the tape before the paint dries completely. Determine how far apart you want your shelves on the wall, then cut eight pieces of cord about 6 inches longer than your intended shelf distance. Tie a knot at one end of each piece of cord, making the tail end of the knot as short as possible. Glue the knotted end to the underside of your top two shelves (about 3/4 inches in from the edges) and allow to set. Mount all three shelves following the package instructions. Working on one cord at a time, pull it gently taut and tie a knot so the bottom touches the shelf below. Cut the excess cord, trying to leave as little of the tail as possible, and repeat for all eight cords. Glue each knot in place so they’re straight and in line with your first set of knots, enhancing the illusion that the cord is running through the shelf.
Peg Doll Woodland Animals
What’s not to love about handmade woodland creatures that serve as nursery decor, toys and birthday cake toppers all in one? Shrimp Salad Circus shows how to whip up a whole forest of cute critters. Tip: This DIY nursery decor idea makes an adorable baby shower gift too!
What you’ll need: Plain wooden peg dolls, pencil, eraser, acrylic paint, paint palette, paint brushes, puff fabric paint, scissors, a hot glue gun and glue sticks.
How to make it: While the end result may look professional, the truth is you don’t need any real artistic ability to bring these woodland creatures to life—there’s plenty of room for error. Head to Shrimp Salad Circus for the full instructions on how to make four different animals.
Hanging Paper Mobile
Who says that snazzy touch of shimmer foil paper lends to party invitations and wrapping paper can’t be transformed into fabulous DIY nursery decor? This festive mobile by The Crafty Blog Stalker is made entirely of foil paper. It takes some time to put together, but the end result is totally worth it. Mix and match your paper patterns to go with baby’s room for a truly standout decorative addition.
What you’ll need: Foil patterned paper (12 inches ×12 inches), paper trimmer, scissors, three metal rings measuring 6, 8 and 10 inches in diameter, glue dots and baker’s twine.
How to make it: Select four sheets from the stack of foil paper. Using a paper trimmer, score a line along the width of the paper at the 3/4-inch-mark. Then rotate the sheet of paper so the score line is at the top and cut into 3/4-inch-wide strips. “Flag” the end of each strip (make sure it’s not the scored end) by cutting a small triangle from the center, leaving two flaps on either side. Fold the 12-inch-long strips of paper over the smallest ring, using the scored edge as a pre-marked fold line, then place a glue dot to the underside of the paper to secure. (The order in which you attach the paper strips doesn’t matter.) Trim the remaining strips of paper to 9 inches, keeping the flagged ends intact. Re-score the other ends at the 3/4-inch mark. Attach the 9-inch strips to the medium ring, folding the strips and securing them with glue dots. Trim the rest of the paper strips to 6 inches and again re-score at the 3/4-inch mark. Attach the strips to the largest ring, repeating steps above. If needed, cut additional strips of paper from the full sheets to fill the large ring.
When all of the rings are filled with strips, it’s time to assemble the mobile. Start by laying the 8-inch ring on top of the 6-inch ring so the strips are splayed out. With pieces of twine, tie the two rings together in three different spots and trim the excess. Lay the largest ring on top. Tie the largest ring to the middle ring in three different spots, again trimming the excess twine. To create the mobile hanger, cut four strands of twine each 15 inches long, and attach them to the largest ring in four spots. Bring each strand together in the center and tie in a simple knot at the top.
Crochet Goldfish Teether
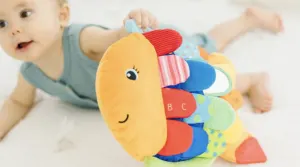
Trust us, this crochet DIY nursery decor project looks nothing like your grandma’s crocheted doilies. This bright, modern teether from One Dog Woof serves double duty as a rattle and will look as good in your little one’s hands (and mouth) as it will on the nursery shelf.
What you’ll need: Cotton yarn, round beads, wooden teething ring, twill ribbon, large-eyed needle and yarn needle, scissors, small plastic Easter egg, polymer clay, tape and fiberfill stuffing.
How to make it: You do need to know how to crochet for this project. That said, it doesn’t require advanced skills. Visit one Dog Woof for the complete how-to.
Felt Ball Rug
This cozy throw rug by Catherine and Grace adds a completely customizable pop of color to baby’s room. It’s a DIY nursery decor project that’ll take a bit of time, but a little patience will pay off in the end.
What you’ll need: Fishing line, scissors, an upholstery needle with an eye large enough for the fishing line to fit through and 1,000 3/4-inch felt balls.
How to make it: Cut a piece of fishing line about 40 inches long and tie a large knot at the end to prevent the fishing line from sliding through the felt ball. Trim the excess fishing line behind the knot. Thread the other end of the fishing line through the upholstery needle, then string 10 to 15 felt balls onto the fishing line, using the needle to guide the line through each one. You can follow a specific color order or choose the balls at random. To secure the balls in place when you’re done, thread the fishing line back through the last two balls on the string and return the fishing line through those same two balls again, leaving some spare fishing line sticking out from the end ball. Wind the string of balls around on itself to create a small, round shape, which will serve as the center of the rug. Cut another piece of fishing line and thread it back and forth through each of the balls to hold the shape in place. Tie a knot at the end of the fishing line and cut off the remainder.
To build off of your rug center, thread felt balls onto the length of spare fishing line sticking out from the end ball. This string of balls, and every string you create going forward, will have its first ball already attached to the main round of the rug. Add balls to the fishing line until there’s about four inches of line remaining. Thread that surplus fishing line back through the last two balls on the string and return the line through the same balls to secure in place. Attach the new string of balls to the growing rug by threading another length of line the through the row of balls on the outside of the round and then back through the new string of balls. Repeat until you have a rug that’s 28 inches in diameter.
Updated November 2017
Navigate forward to interact with the calendar and select a date. Press the question mark key to get the keyboard shortcuts for changing dates.


